
How do I create a webcast in Panopto?
A guide can be found in the manufacturer's tutorial How to Create a Webcast URL and a Waiting Room in Advance (opens in new tab)
Additional Notes:
- Good to know: If the webcast is running on a laptop, it should be connected to a power source, as the webcast causes high CPU usage and consumes a lot of energy.
- A webcast can be started spontaneously, but it is better to set it up beforehand on the Panopto platform. Copy the streaming link generated and make it available for a course in the corresponding Moodle course. This can also be set up in advance for each weekly session of the course.
- Once the webcast is ready to start, open the Panopto Recorder and tick the box for “Webcast” (if the webcast has not been prepared). If a webcast has been set up, select the previously created session and click “Join Session”.
- Select the appropriate audio/video source and, as a secondary source, choose “PowerPoint Recording” if you want to show a slide presentation.
- Then start the ''recording''.
Note for hybrid settings
This means you want to deliver a lecture with a slide presentation in person in the room while simultaneously live streaming it online via webcast.
- As the secondary source, select not only ''PowerPoint Recording'' but also ''Capture Second Screen'' – see Image 1.
- If you forget to do this and start the webcast as well as your screen presentation on the projector, a message may appear: ''Do you want to include the full screen in the webcast screen image?'' You must confirm this with ''Yes'' – see Image 2.

Image 1: Select secondary sources
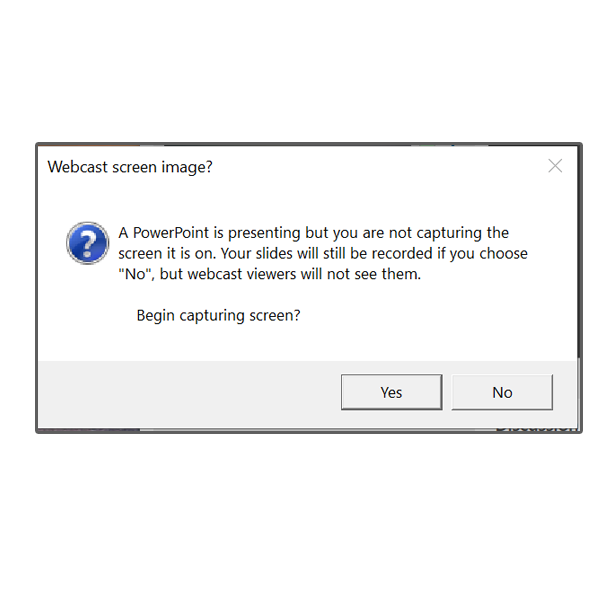
Image 2: Confirm the message if it appears
Update: 09.12.2024