Hybrid Teaching

Scenario B ~ interactive

The course is characterized by the active participation of all students, both on-site and via web conference. A direct verbal exchange between on-site and online participating students is specifically facilitated and supported through the use of didactic methods. The level of interaction is high. This scenario is well-suited for small groups but is technically and didactically demanding. Therefore, assistance or co-moderation to support the instructor is recommended.

Further scenario A ~ presenting

Sound, video, presentation slides of the instructor and the on-site participants are transmitted online, the online participants can participate via audio and are visible on site in the room via video image

Choosing the appropriate technology for Scenario B

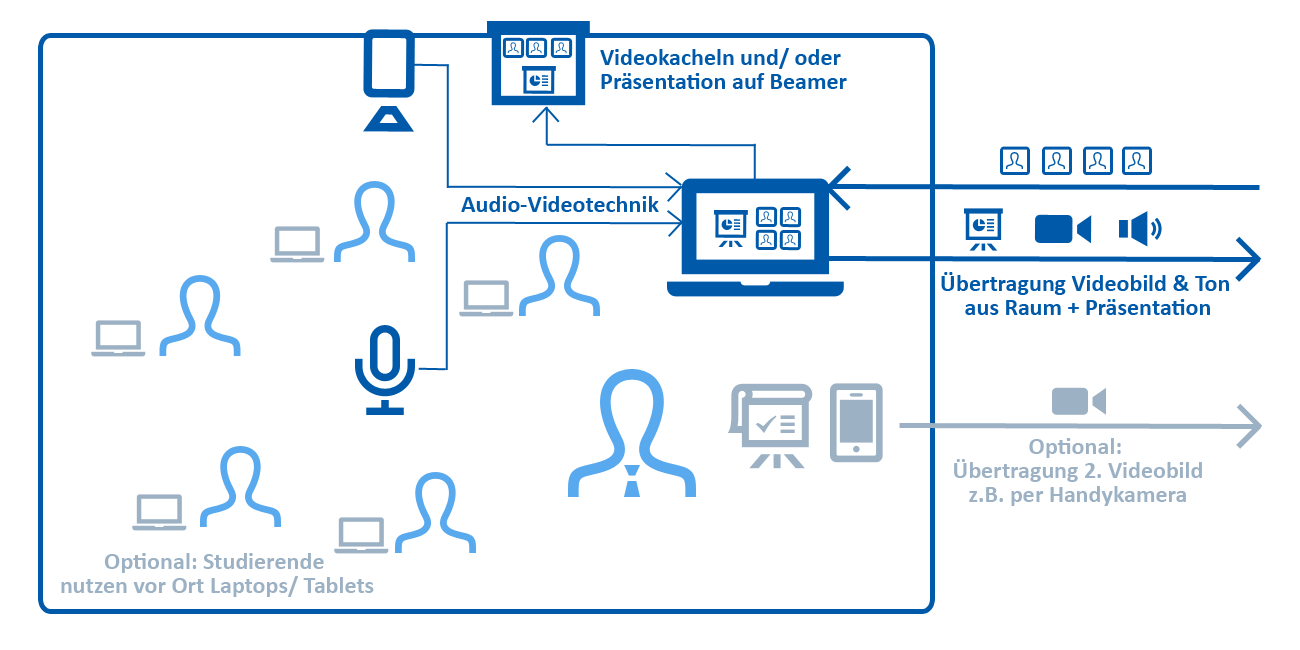
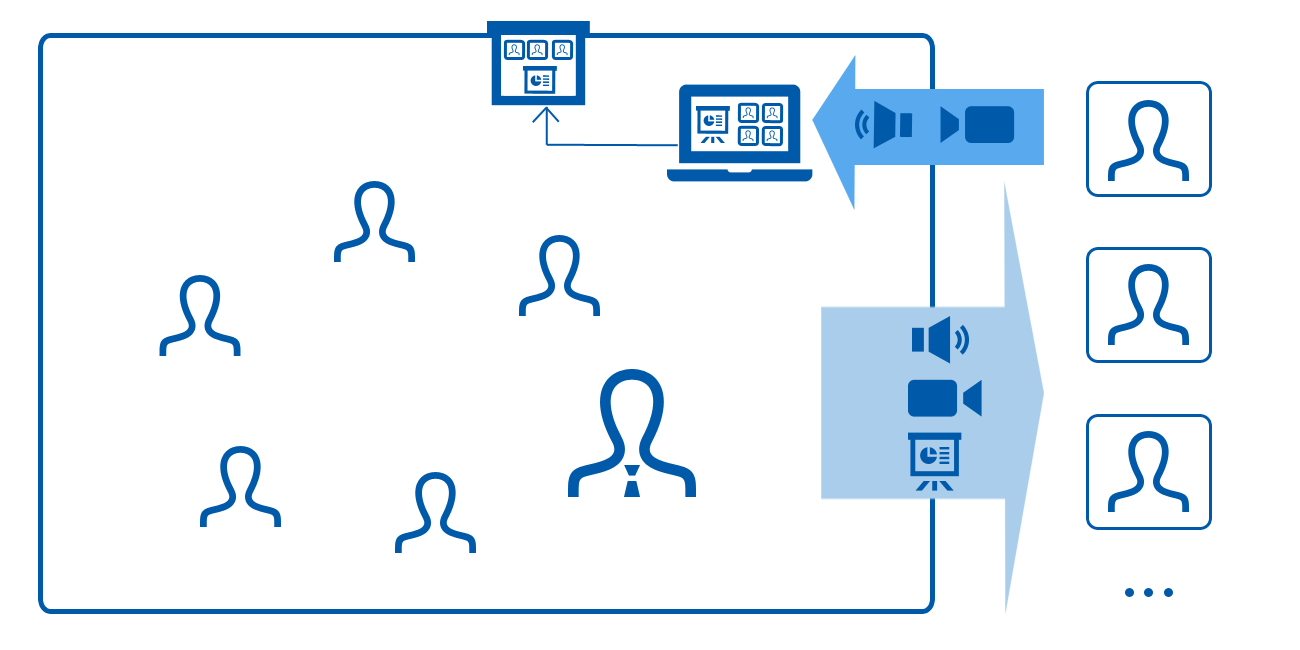
In this scenario it is important that

  • the on-site participants can hear and ideally also see the online participants well; that is, the web conference view with the video tiles should be visible on the projector display;
  • the online participants can hear the on-site participants clearly and at least see them in a full room view (video image “wide shot”) using appropriate audio-video technology in the room;
  • the instructor and all presentation materials (e.g., flipcharts, other on-site objects) are clearly visible to the online participants. An additional video feed may be necessary for this.

In our overview for choosing the appropriate technology , you will find two concrete technical setups that are suitable for scenario B:

  • for traditional seminar settings with a mix of input phases (mostly frontal) and discussion/conversation (the instructor moves around the room/into the audience)
  • when more than 10 people are present on-site
  • a certain level of speaking discipline is required here (it’s problematic to start speaking before the microphone has not been passed)

On page 3 of the PDF: Overview for choosing the appropriate technology (in German) (opens in new tab)

  • more suitable for workshop settings/conversation rounds where participants sit around a table island
  • only for a small number of on-site participants (maximum around 15)
  • relatively natural conversation situation possible and very easy to handle
  • the room should not have any echo
  • available through HRZ media equipment rental

on page 6 of the PDF: Overview for choosing the appropriate technology (in German) (opens in new tab)

Alternative technology products:

Supplementary handling instructions

Make sure to get the students' consent!

Consider what alternative handling you can offer to those who do not want to be recorded. For example:

  • Create areas in the room that are not covered by the camera. These should also be far enough away from the room microphone if a tabletop conference system (e.g. Logitech Group) is used. In this case, remember to repeat the contributions of the students!
  • Online students just use chat when they don't want to be recorded.

However, all this can be at the expense of interactivity. Therefore, weigh up – preferably together with your students – whether recording is necessary in this setting.

e.g., because a student is to assist in keeping an eye on the chat or because you want to transmit other video sources.

Pay attention to this and explicitly inform the students present on site that these end devices are NOT connected to their computer audio! (Either do not connect the computer audio at all when entering the Zoom meeting or later select the setting “Leave computer audio” at the microphone button). Otherwise, very unpleasant noise (so-called “feedback”) can occur.

e.g., camera for overall space perspective and another camera to show details

Support the online participating students in handling, because for them these simply appear as equivalent video tiles in the web conferencing system:

  • Give the video sources in Zoom an appropriate label (e.g., “Room camera” and not Max Mustermann).
  • Introduce the different video sources and what is to be shown about them.
  • Show how a video image can be pinned in Zoom to see it in full view.
  • Comment on the changes and thus direct the focus to the currently relevant video source (e.g., “Now I'll switch to the flipchart and you can set the flipchart image to large again”).
  • Practice this briefly with your students at the beginning.
Foto: Schreibtisch mit Monitor, auf dem Hörsaal zu sehen ist, wo Lehrperson eine Präsentation zeigt und weitere Studierende online zugeschaltet sind.
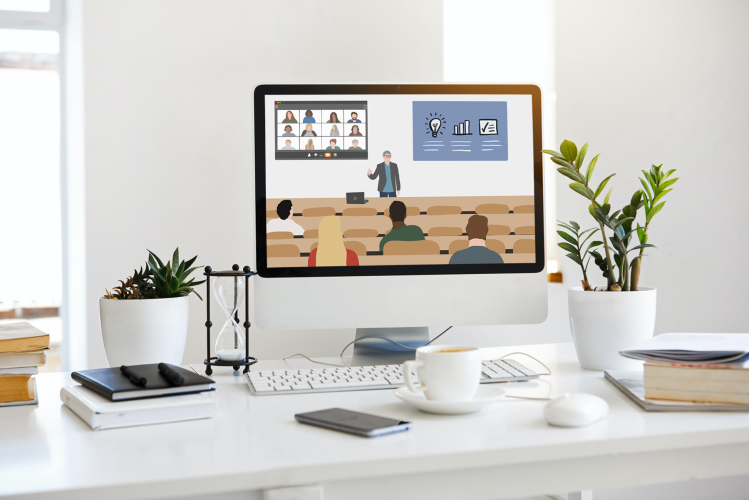
Picture: Original: Serpstat, pexels.com | Source

Didactic considerations

Learn how to effectively engage both on-site and online participants, why your positioning in the room is important, and why breaks are essential, and how you can organize small group work.

Learn more