Course formats
Moodle offers a selection of different course formats that can be used to customise your course room. Choosing the right format not only helps to make your course look better, but also contributes significantly to a better overview. It is worth taking a look at the different Moodle course formats, especially for very extensive courses.
Selecting a course format
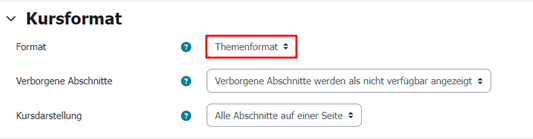
You can access the selectable course formats by clicking on Settings in the navigation bar above in the respective Moodle course room. The course settings page will then open. Scroll down to the Course format sub-item and select the desired format from the drop-down menu (see Screenshot “Selecting course formats”).
In the following, we would like to shortly introduce you to the available course formats and show you how you can customise them and configure them according to the requirements of your course.
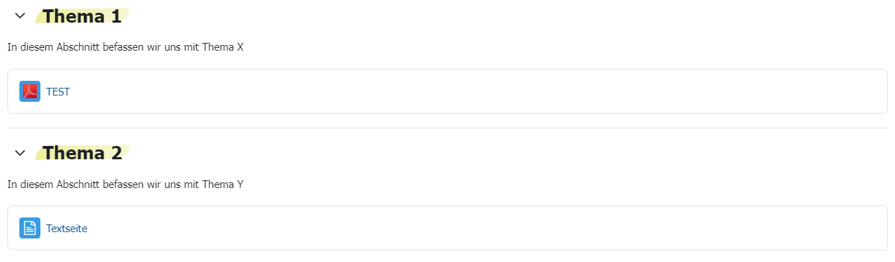
As standard, a newly created Moodle course is displayed in the topic format. As the name suggests, this format is based on displaying individual topical course sections in a structured way.
Each topic appears in the course as an individual section listed one below the other and can be edited as required. This makes it possible to assign the desired materials, tasks and activities to each individual subject area.
Using the topic format is particularly recommended for courses that can be divided into a manageable number of separate sections. For an even better overview, you can also select the course layout option Show one section per page (you can find more information on this in our FAQ article Course layout options).
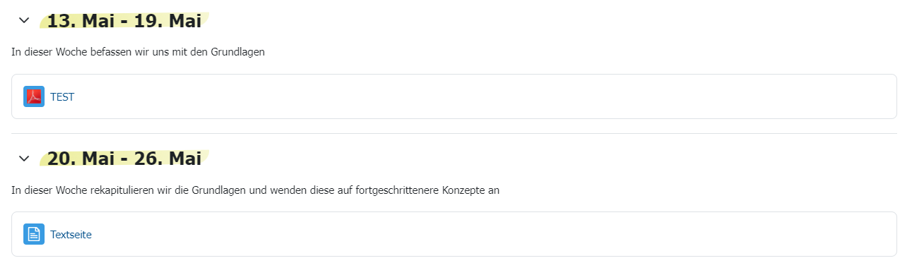
The Moodle weekly format is very similar in structure to the topics format, with the difference that individual weeks serve as sections instead of topics.
This format is therefore ideal for courses that follow a less strict topical division or that are specifically structured along certain time periods. The weekly format allows several topics to be summarised in one section without losing the necessary clarity. As with the topics format, the option Show one section per page can also be activated for the weekly format (you can find more information on this in our FAQ article Course layout options).
Note: The weekly format automatically adopts the dates entered under Course start and Course end. You should therefore ensure that these are entered correctly (can be viewed by clicking on Settings in the navigation bar above). Instead of the default weekly division, other periods can also be selected. For example, it would be just as possible to divide it into 14-day periods. In this case, however, the displayed periods must be adjusted manually. Set your course to edit mode by clicking on the Edit slider at the top right of the course room. You can now edit the default time periods (names of the sections) as you wish.
The Moodle Onetopic format offers a horizontal structure as an alternative to the vertical alignment of the topic and weekly format. Especially for courses that offer a lot of content, the horizontal arrangement of the individual sections contributes to a better overview and saves users long scrolling on the course page.
In Onetopic format, each course section is displayed on a separate page. Navigation between the individual sections is via the table bar.

The Onetopic format offers some additional selectable settings that can be used to further customise the course display:
- The Hide tab bar option can be used to show and hide the table bar
- The option Visualization mode of section 0 allows you to integrate the course overview into the table bar or to outsource it
In addition, the bar itself and the individual sections listed in it can be formatted further, for example to make colour adjustments. These can be used to visually highlight individual sections in the table bar of the course. First set your course to edit mode by clicking on the Edit mode button at the top right of the course room and then use the tab bar to select the section you want to change the colour of. Now click on Edit and then on Edit section. The usual editing view of the Moodle section will then open. You will now be offered additional design options in Onetopic format:
- You can use the Font colour and Background colour options to change the colour of the section in the tab bar
- The Level option also allows you to move the selected section to a second, lower-level table bar
Moving sections
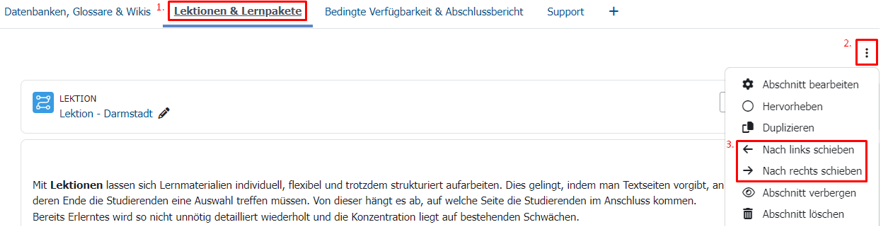
To change the order of the sections in Onetopic format, switch your course to edit mode and click on the three dots of the section again. You can now use Move left and Move right to change the position of the currently selected section.
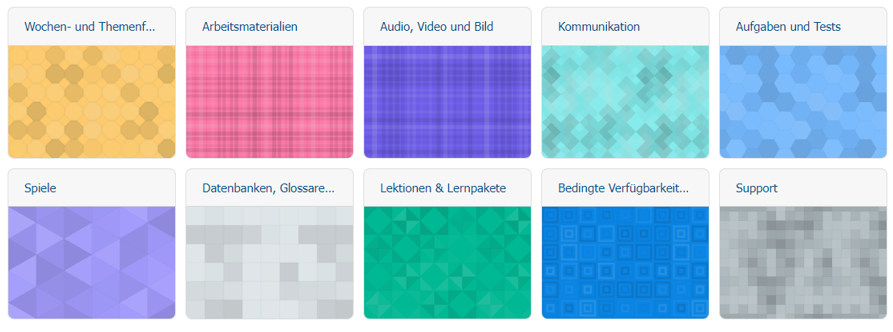
The Moodle grid format offers a visually pleasing, clear alternative to the standard topic format. Similar to the Onetopic format, the grid format is particularly suitable for very extensive courses, as it provides users with an overview of the individual course content at a glance and therefore avoids long scrolling on the course page.
The course view in Moodle Grid format has a modular structure. Each course section, or topic, is displayed as a small square, so that the entire course is ultimately made up of a grid of topic squares. The course content of the individual topic squares is hidden and only becomes visible by clicking on the respective topic. In this way, the grid format offers the greatest possible clarity for courses that are rich in content.
After selecting the grid format, you have a lot of additional settings and design options at your disposal that you can use to customise the grid view of your course room. The following options are available, among others:
- Section image (in the relevant section settings)
- Number, positioning and size of the topic squares
- The option Use Popup allows the sections to be displayed in a popup instead of on a new separate page
The Moodle tile format offers an appealing and clear alternative to the standard topic format. Similar to the Onetopic format, the tile format is particularly suitable for extensive courses, as it gives users a quick overview of the individual course content and avoids long scrolling on the course page.
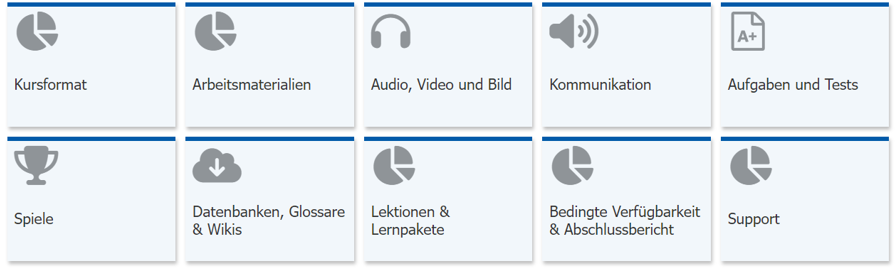
After selecting the tile format, various settings and customisation options are available to adapt the display of your course room to your requirements. The following options are available:
- Customise the display of the tiles (colour & icons)
- Activation of the progress display (if progress tracking is activated)
- Use of sub-tiles and filters
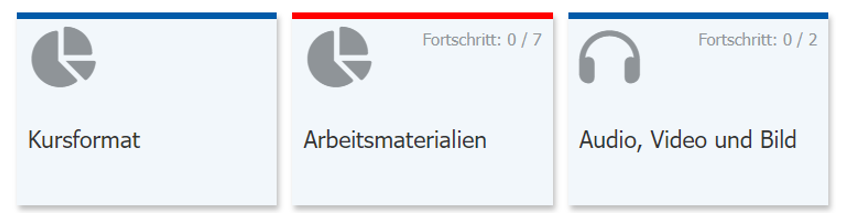
If you have activated progress tracking, the percentage or fraction of the course completed by the user is displayed in the corner of the tiles. This allows users to clearly see their progress in each topic of the course.
It is also possible to highlight a tile. If you click on “Highlight” in the editing menu of a tile, only this tile is displayed with a red bar at the top.
The format is optimised for mobile devices and adapts to different screen sizes and orientations so that the course can be easily viewed on different devices.
Note for the design process:
If you make adjustments to the default settings of the tile format (e.g. to the colour and icons of the tiles), these adjustments will only remain as long as you are in the tile format. If you leave the tile format and switch to another course format to see how your course looks in this format and then decide to switch back to the tile format, your customisations will be lost and the tile format will appear in the default settings.