Didactics & Scenarios

Hybrid Teaching

Scenario B ~ interactive | for small groups

Further scenario A ~ present

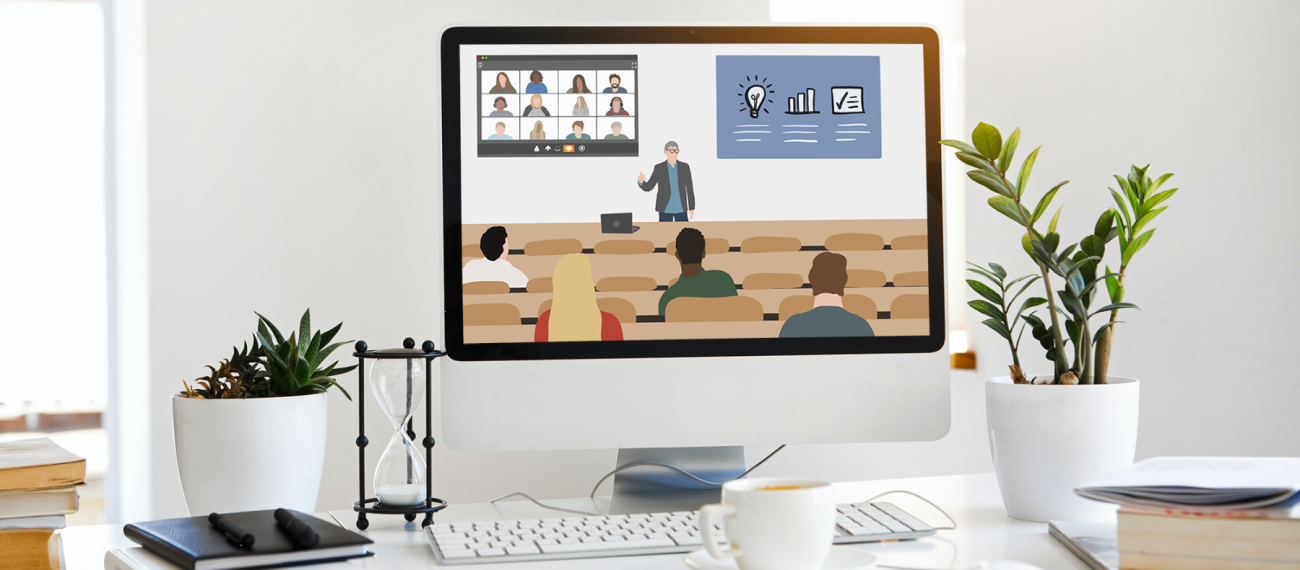
What is the Setting for Scenario B?

  • One part of the students is on site in the seminar/workshop room at the course date.
  • The other part participates online via web conference .

The course is characterised by active participation of all participants through the use of methods that promote communication and cooperation.

  • Accordingly, a direct spoken exchange between on-site and online participants is specifically facilitated here.
  • The level of interaction is high.

Rather suitable for small groups and technically-didactically demanding. Therefore, an assistant / co-moderator to support the teacher (especially in group work) is recommended!

Choosing the right technique

The audio-video technology in the room must enable online and present participants (incl. teacher) to hear and see each other; if necessary, additional terminal devices are needed on-site to be able to use cooperative online tools.

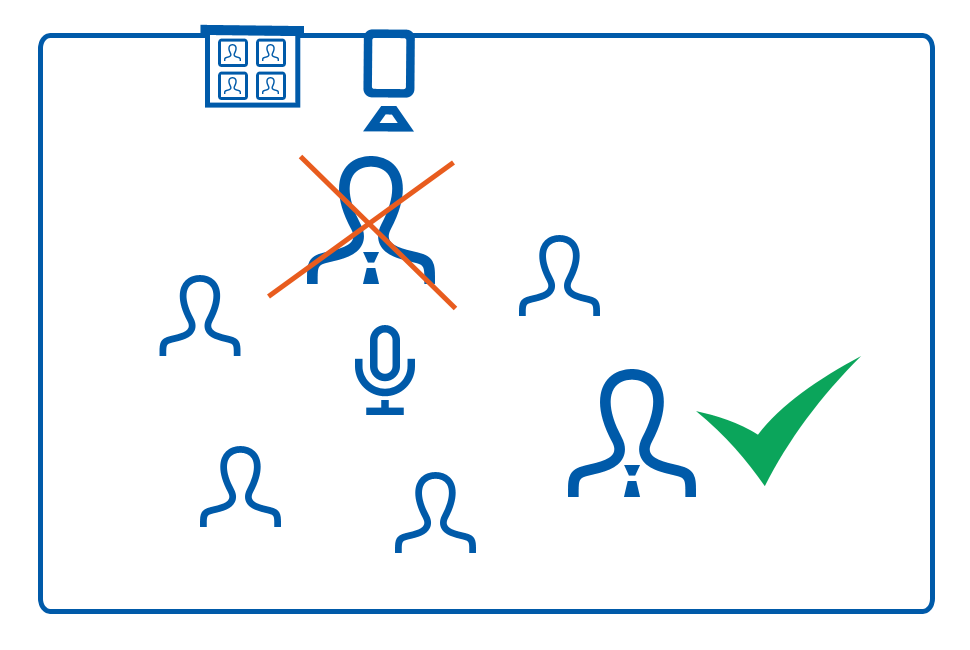
In scenario B it is important that

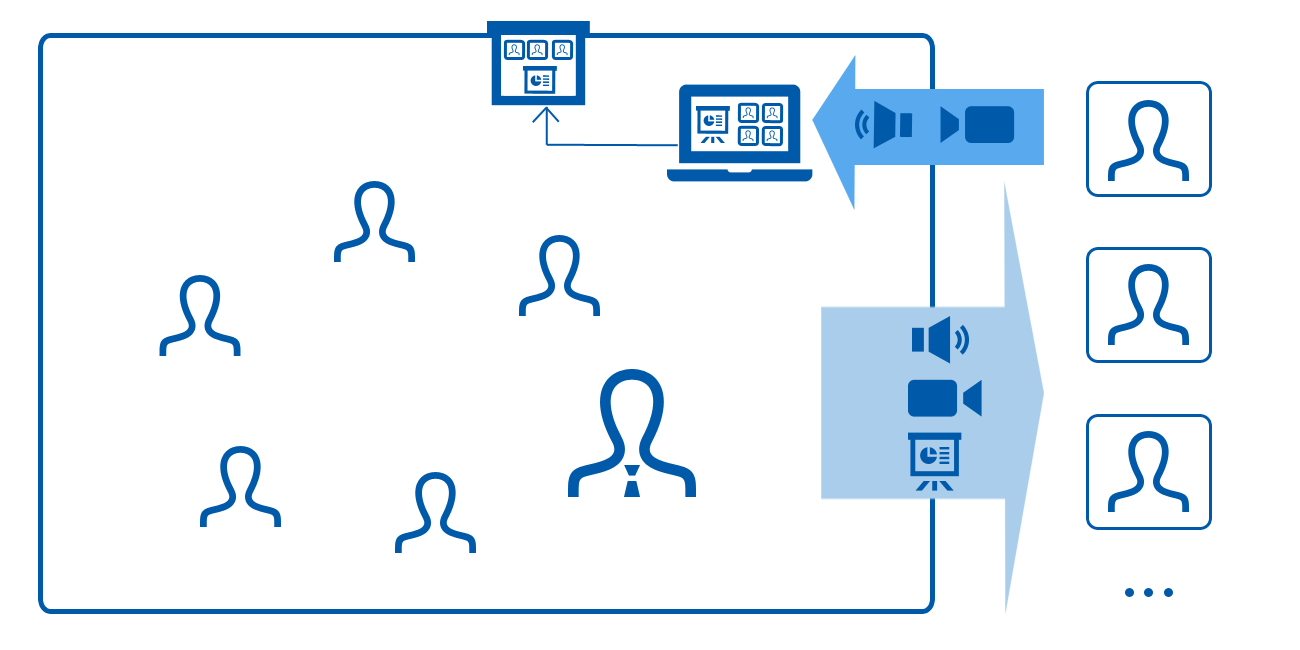
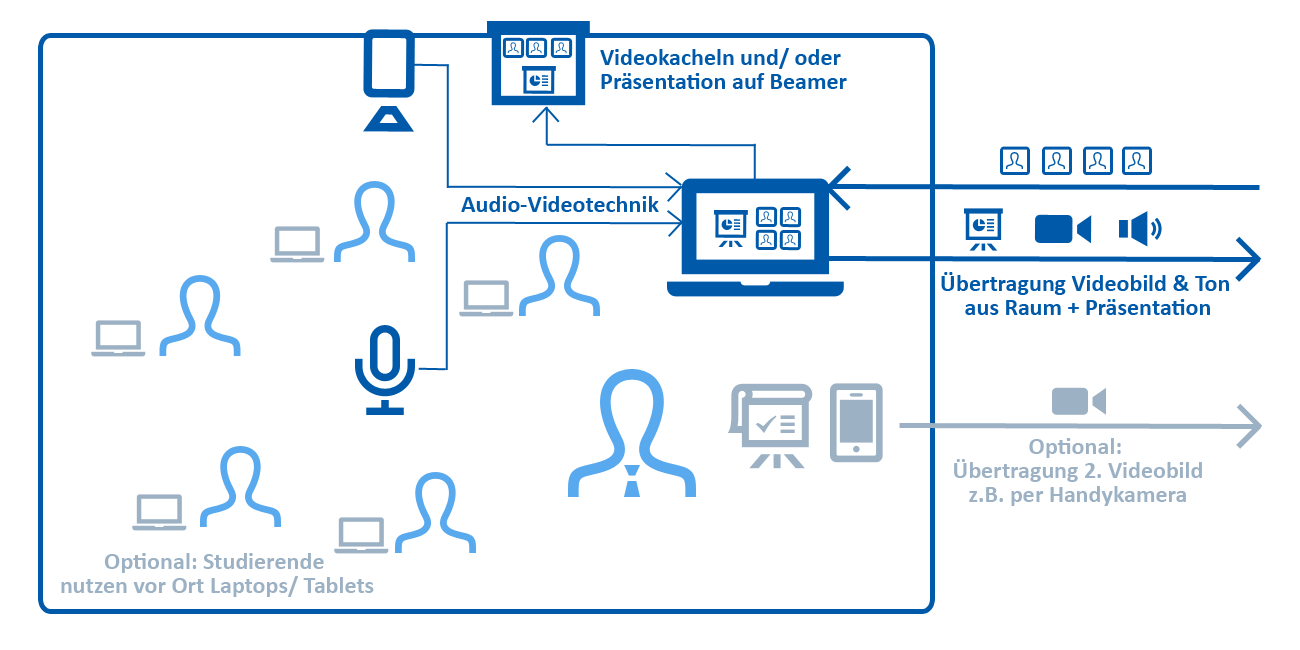
  • those present on site can hear the online participants well and ideally also see them (beamer display of the web conference view with video tiles),
  • the online participants can hear the people present on site well and can at least see them in an overall room view (video image “absolute”) (with the help of appropriate audio-video technology in the room),
  • the teacher and all presentation materials (e.g., also flipchart, other objects on site) are clearly visible to the online participants (additional video image may be necessary).
Complete overview of the technical options for hybrid teaching as a PDF (with decision matrix, when which technical setup is suitable and short profiles of the individual setups).

In our general overview of technical possibilities for hybrid teaching at the TU Darmstadt, you will find two concrete technical setups that are suitable for scenario B:

At a glance: technical possibilities for hybrid teaching at the TU Darmstadt (opens in new tab)

  • Setup 2 with AI camera “OBSbot”(page 3)
    • For classic seminar settings with alternating input phases (rather frontal) and discussion/ conversation (lecturer moves around the room/ into the plenary)
    • if more than 10 persons are present on site
    • Some speaking discipline required (waiting briefly for the microphone instead of just talking away)
  • Logitech Group Setup (page 6)
    • rather for workshop settings/ discussion rounds in which participants sit around a table island.
    • only with few people present on site (maximum approx. 15)
    • relatively natural conversation situation possible and very easy to handle
    • the room must not have any reverberation
    • available via HRZ media equipment lending service

Note: These are technology products that we have been able to test ourselves. – Of course, there are mostly alternative products to these on the market (such as conference speakers/microphone Jabra Speak 710).

Do you have further questions about the setups? – Please feel free to contact us: . We can try out the technique with you and think it through together specifically for your setting.

If you want to record the course:

Make sure to get the students' consent!

Consider what alternative handling you can offer to those who do not want to be recorded. For example:

  • Create areas in the room that are not covered by the camera. These should also be far enough away from the room microphone if a tabletop conference system (e.g. Logitech Group) is used. In this case, remember to repeat the contributions of the students!
  • Online students just use chat when they don't want to be recorded.

However, all this can be at the expense of interactivity. Therefore, weigh up – preferably together with your students – whether recording is necessary in this setting.

If other devices are used on site that are also logged into the web conference:

e.g., because a student is to assist in keeping an eye on the chat or because you want to transmit other video sources.

Pay attention to this and explicitly inform the students present on site that these end devices are NOT connected to their computer audio! (Either do not connect the computer audio at all when entering the Zoom meeting or later select the setting “Leave computer audio” at the microphone button). Otherwise, very unpleasant noise (so-called “feedback”) can occur.

If you use multiple video sources:

e.g., camera for overall space perspective and another camera to show details

Support the online participating students in handling, because for them these simply appear as equivalent video tiles in the web conferencing system:

  • Give the video sources in Zoom an appropriate label (e.g., “Room camera” and not Max Mustermann).
  • Introduce the various video sources. Introduce the different video sources and what is to be shown about them.
  • Show how a video image can be pinned in Zoom to see it in full view.
  • Comment on the changes and thus direct the focus to the currently relevant video source (e.g., “Now I'll switch to the flipchart and you can set the flipchart image to large again”).
  • Practice this briefly with your students at the beginning.
Screenshot Präsentation Mobiles Setup für Hybride Seminare am KIT
Picture: KIT (www.zml.kit.edu/hybride-seminare.php)

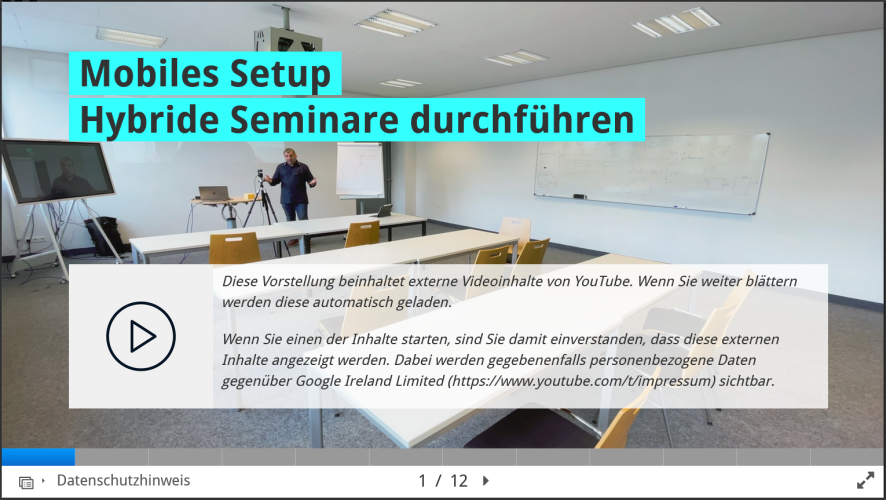
Mobile Technology & Methodological Suggestions for Hybrid Seminars at the KIT

On the info website of the KIT (Karlsruhe Institute of Technology), you will find helpful explanations on the technology of a mobile setup for hybrid seminars (this corresponds to our setup 2 – see above – with the AI camera “OBSbot” and the radio microphone set “Hollyland Duo”). You will also find methodological suggestions for implementation.

Learn more

Didactic considerations for scenario B

There should be no on-site learning activities in which the online participants cannot participate.

  • To do this, adapt methods from classic face-to-face teaching or purely online teaching a little.
  • If necessary, use online tools for this purpose, for example for live voting or for cooperative collaboration (e.g.,Etherpad , Padlet ), provided that the students present on site have appropriate terminal devices at their disposal.

Examples of method adaptations using online tools:

  • Previously: Classification tasks, which you might have done in a purely online course simply by having the students put a dot/star etc. on a prepared grid or similar with the help of the comment function.
    (In purely face-to-face teaching, this would be done in the same way on the blackboard/whiteboard).
    • Alternative for hybrid: use the question types “Scales”, “Ranking”, “2x2 Grid” in the live voting toolMentimeter
  • Previously: Think Pair Share, which you might have done in the classic setting by presenting a question, asking the students to think about it, then briefly discuss it with the person sitting next to them and then collect their ideas and thoughts together in plenary, e.g. on a flipchart.
    (In the purely online course, you certainly solved this with the help of breakout rooms and a digital whiteboard either within Zoom or via an online tool, such as Etherpad).
    • Mix variant for hybrid: The students present on site exchange ideas with their seat neighbours in the pair phase (observe current spacing rules!) and the online students go to breakout rooms meanwhile. In the share phase, use either an online tool such as Etherpad or a flipchart on site with a camera pointed at it.
  • So far: Fishbowl discussions, which are easily feasible in a classic face-to-face setting with an inside and an outside sitting circle, but difficult to carry out in a purely online setting.
    • Variant for hybrid: The face-to-face students form the inner circle for discussion. The online participants observe/document “from the outside” and, if necessary, contribute to the discussion via a “buzzer” (e.g., Cosmobuzz). Afterwards, they describe their observations.
  • Chat, hand signal function, just speak in? – Discuss with each other beforehand how it is best for you that the online participants as well as the on-site participants can get involved.
  • In addition to an assistant who helps you technically on site, it can also be helpful to have a co-moderator among the online participants who interrupts you specifically and draws your attention to hand signals, questions in the chat, etc. from the online participants.
  • Try to work towards webcams being switched on. Especially during the interactive phases or small group work. Make it clear that the interaction between the group present on site and the group participating online works much better that way.
  • Address the group connected online directly. To do this, position the camera on your line of sight to or next to the beamer image.
  • If possible: Arrange the interior design (positioning of tables and chairs) and position the camera(s) so that everything is clearly visible to the online participants.

The sense of belonging

of online participants and on-site participants to each other is improving,

  • If those present on site can see the online participants on a beamer the whole time (becomes a challenge if only one beamer is available and you want to show a presentation or other screen applications)
  • and if the online participants can see a video image with all those present on site all the time.
    • To make this possible, use a secondary camera if you want to show certain things in the room or details (e.g., flipchart, equipment).
    • Or moderate the change of camera angles.

General challenge

will be not to focus too much on the online group and to find a balance between the online group and the on-site group.

Scenario B: recommended seating position for instructor(s)

Otherwise you would be sitting between online and on-site participants.

This way you would always have one of the two groups at your back, which would be unfavourable. In order to address all students, it would be better if they are in your field of vision.

Because:

  • If, for example, the “Logitech Group” table conference system is used on site, any background noise, such as moving chairs, putting down glasses, chatting with each other, etc., is clearly audible to the online participants and very tiring in the long run.
  • It is often more difficult for online participants to get a word in edgewise or to interrupt existing conversations on site.

Separate:

On-site students form one or more groups on-site (please observe the current spacing rules!), online students go into breakout rooms.

  • The easiest way is for all groups to digitally document their work results using an online tool.
    • Prerequisite: on-site presence students have laptop or tablet available in their respective small group
  • Otherwise, in the debriefing, the work results of the face-to-face students present on site may have to be made visible to the online participants via a second camera (e.g. camera on flipchart) and the digitally documented work results of the online participants must be made visible to the face-to-face students present on site via the beamer (e.g.,Etherpad ).

Mixed:

On-site face-to-face and online students form groups together and “meet” in breakout rooms

  • Prerequisite: the students present on site (at least 1 person per group) have laptop/tablet with integrated microphone and webcam available and the possibility to go to another room. Otherwise there is a risk of feedback (very unpleasant background noise) if several end devices are logged into the web conference in one room with active audio.
  • Think in advance about how you want to divide the groups.
  • If the present participants also log into the web conference, one could ask all participants to write a small abbreviation to their name in the web conference system, e.g., (O) / (P), in order to make it clear who is participating online and who is participating on site in presence.
  • Work results should be documented digitally with the help of an online tool.
  • The small groups should choose a spokesperson for the debriefing.

Further recommendations:

  • Think carefully about the process and communicate it clearly to the students
  • Ideally, you have a co-moderator among the online participants who supports you
  • Think about how to keep the assignment visible for everyone (use an online tool or the learning platform if necessary).

In this interactive setting, it is very demanding, especially for the online participants, to follow the on-site events attentively (e.g., to be able to understand everything that is said well). It is also a great challenge for you as a teacher because you have to think of many details.

So schedule more breaks for the sake of you and your students!

Do not end the web conference meeting as soon as the event is over. Instead, leave it running, including the camera with the overall spatial perspective, until all participants on site have left the room.

This avoids the online participants feeling “locked out.”