
Use External Video Resources
There are several ways to use external videos in a Moodle course. Embedding allows you to display a video directly in the course room. Another way to provide external videos is through the use of the Link activity.
Please note that this article specifically addresses the use of external videos. If you want to provide your own videos, you can find more information in the article “Use own Video Ressources”.
Embedding External Videos
The following explains two options for embedding a YouTube video in the text editor.
Option 1: You can use the automatic embedding function in the TinyMCE text editor by clicking on Link button in the editor bar and then entering the desired URL.

Option 2: Alternatively, you can insert the embed code in the HTML view in the editor. To do this, click on “Share” below the YouTube video after opening it and then on “Embed”. The code marked in the screenshot YouTube-Video must then be copied into the editor.
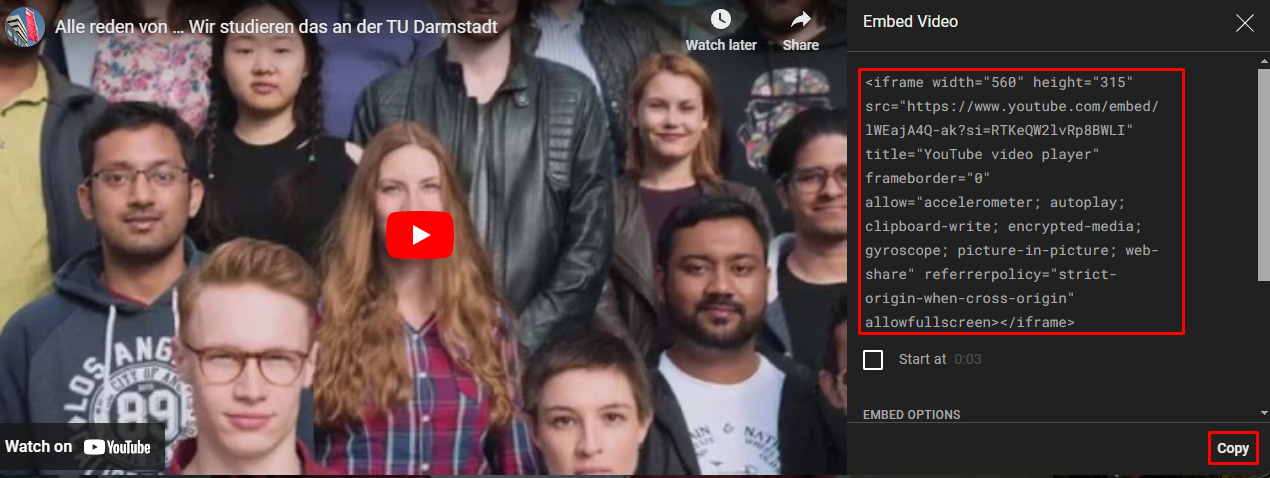
To do this, click on the Tools tab in the TinyMCE text editor and select the Source Code (“<>”) option. Insert the copied code.

The two values behind “width=” and “height=” can be changed to adjust the size of the window displayed in in the course. These values represent the number of pixels.
For embedding individual videos, the “Text and media area” activity is recommended. If you do not want to display the videos directly in the course, the “Page” activity might be the better option.
Linking External Videos
If you do not want to display the videos directly within the course, you can link to the external source instead.
Use the “URL” activity for this:
- To add a link as an activity to your course, switch into edit mode by toggling the “Edit mode” slider in the top-right corner. Then click on “Add an activity or resource” and select “URL”.
- Assign a name, enter the video URL under “External URL” and add a description if needed.
- Under “Appearance” you can specify how the link should be displayed.
- Additional settings can be configured in the various sections.