
Scheduler Activity
The “Scheduler” activity enables the scheduling of appointments for course participants. Teachers have the opportunity to for example offer consultation appointments, which can then be booked.
To add the scheduler to your course as an activity, switch your course to edit mode by activating the “Edit” slider in the top right corner. Then click on “Add an activity or resource” and select the scheduler.
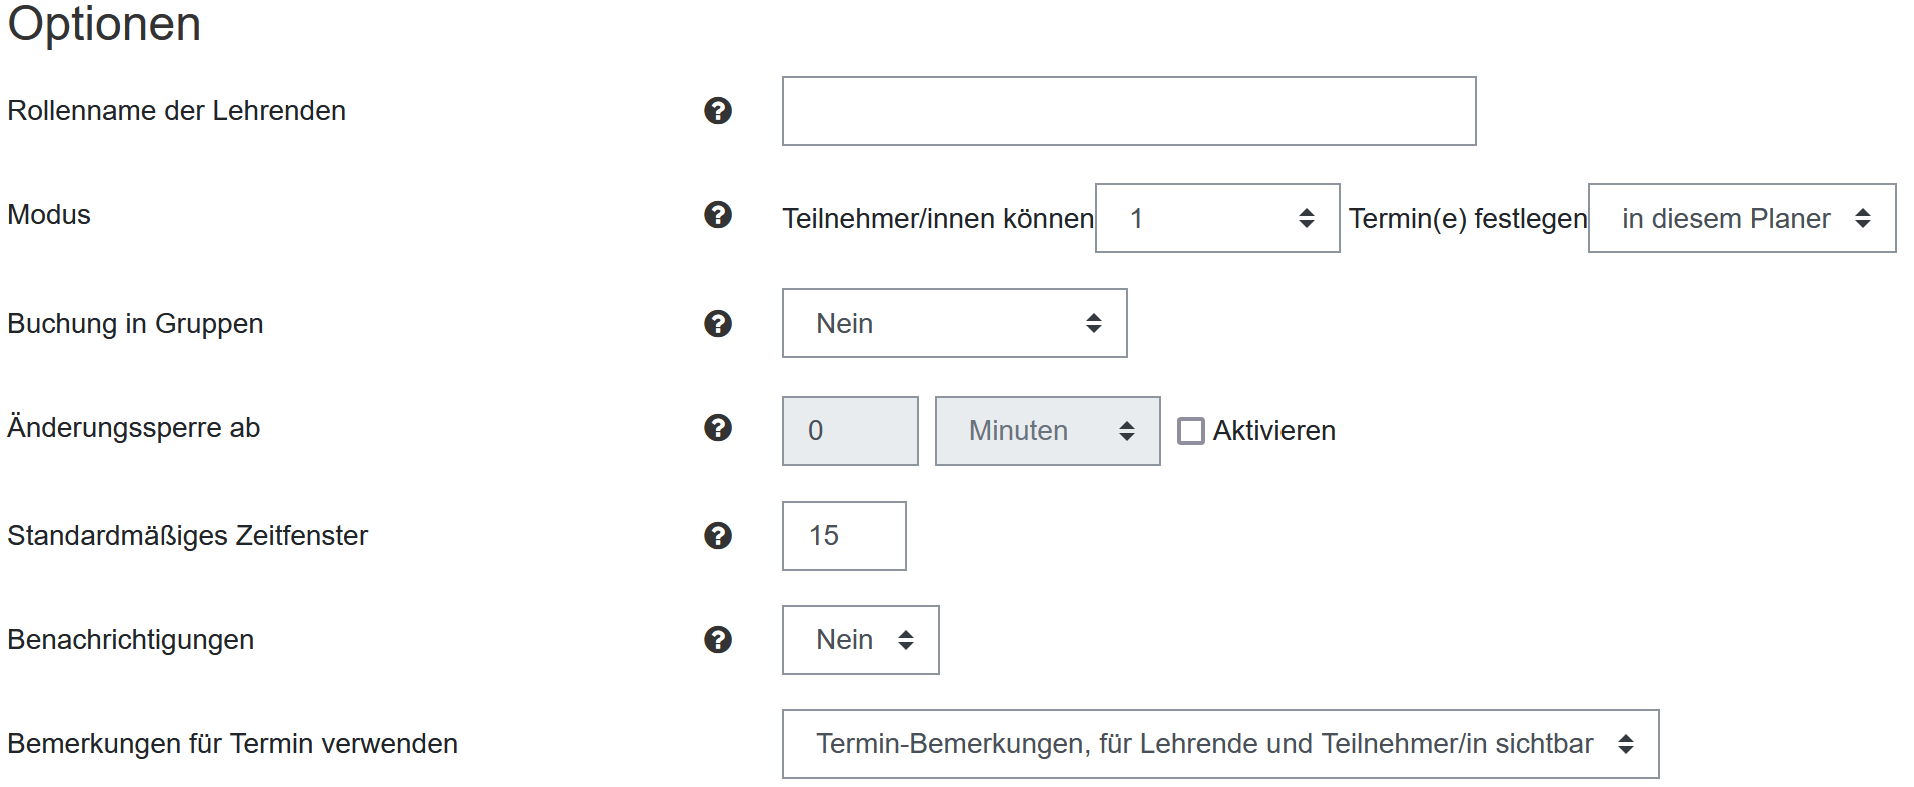
The following options are available in the activity settings of the scheduler (see screenshot Options):
Role name of the teacher
As standard, the role of the person responsible in the course room is “Teacher” (“Lehrende”). If a different role name is to be displayed to the students, this can be entered here.
Mode
Mode can be used to determine a) how many appointments students can book in total within this activity or b) how many appointments can be booked at once.
- a) If you select a number “n” and “in this scheduler”, participants only have the option of booking “n” appointments and no new appointments if a meeting has already ended.
- b) If you select a number “n” and “at a time”, you determine how many appointments participants can book. As soon as a meeting is over, participants can book appointments again up to a maximum number “n”
Booking in groups
You can activate appointment booking for groups here. You can find information on how to create groups in this FAQ Article: Using groups.
Guard time
With a guard time, you can prevent appointments from being cancelled by students at short notice before the appointment.
Default slot duration
Default slot duration specifies the duration of appointments. This information can be changed at a later date and does not affect existing appointments.
Notifications
If the notifications are activated, participants and teachers will receive notifications when appointments are booked or cancelled.
Use notes for appointments
Here you can activate notes for appointments. These can be comments that are visible to participants and teachers and/or confidential comments for teachers only.
Once you have made all the necessary settings, you can click on “Save and display” and continue with setting up specific appointments.
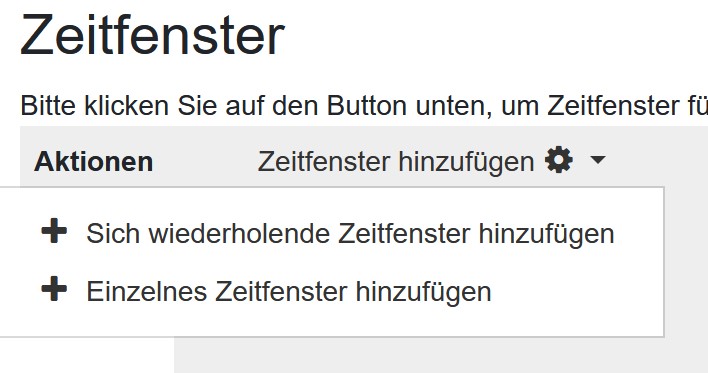
In the planner, which is now still empty, you can set up your appointment offer by adding time slots.
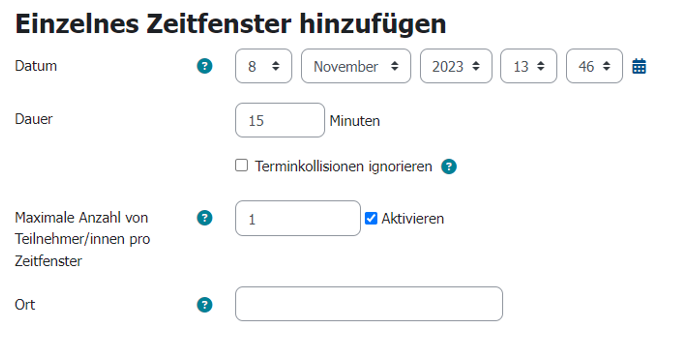
Adding a single time slot
With a single time slot, you define a one-time appointment.
The following options are available:
Date: The date represents the day of the appointment.
Duration: The duration of the appointment is defined using this option.
Optionally, you can define the maximum number of participants per time slot, the location and a responsible teacher. Define when the time slot is visible to the students. Activate an e-mail reminder or leave a comment for the appointment.
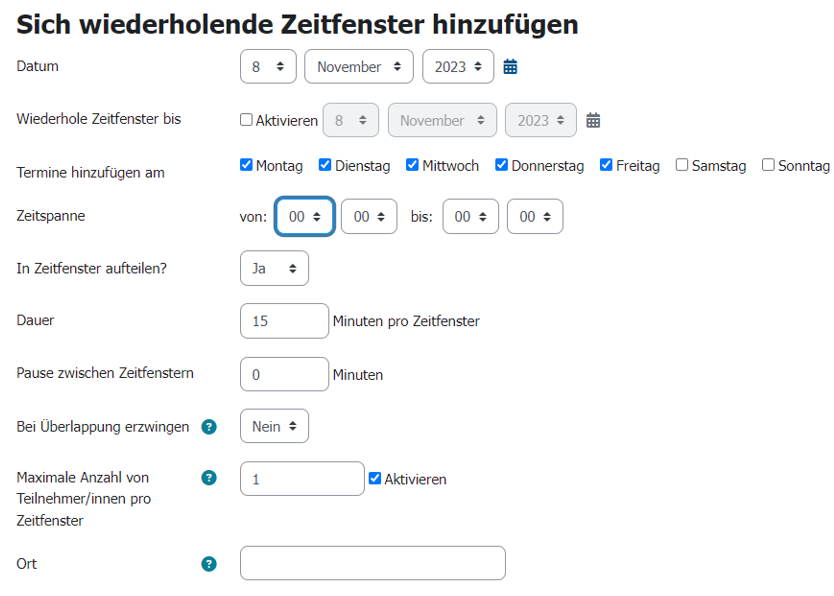
Adding repeating slots
You can use repeating time slots to set up a regular appointment.
Note: A time slot is a single appointment for a student or a group. The time range is the total duration available to the teacher.
There are also various options here:
Date: The start of the time slot series is entered here.
Repeat time slot until: Date of the end of the series.
Add appointments on: This option allows you to specify the days of the week on which the appointments are to be offered.
Time range: The time range represents the total duration of the consultation hour. This can be divided into several slots (time slots).
Divide into time slots: If you select this option, you can specify in the following setting the size of the individual time slots into which your appointment should be divided.
Duration: The duration determines the size of the individual time slots into which your appointment is to be divided.
To enable your course to book appointments in groups, you must have previously ensured that groups exist in your course, for example using the “Group choice” activity, and you must have activated booking in groups in the scheduler options (see section “Setting up the scheduler” the screenshot “Options”). You can also find out how to set up groups in this FAQ Article: Using groups.