
Grades in Moodle
Grades can be entered in various places in Moodle. Where you enter grades depends on exactly what you want to grade. The different options are explained below.
Settings for Grading
When you create an assignment, for example, you have the option to configure some settings related to grading the submission.
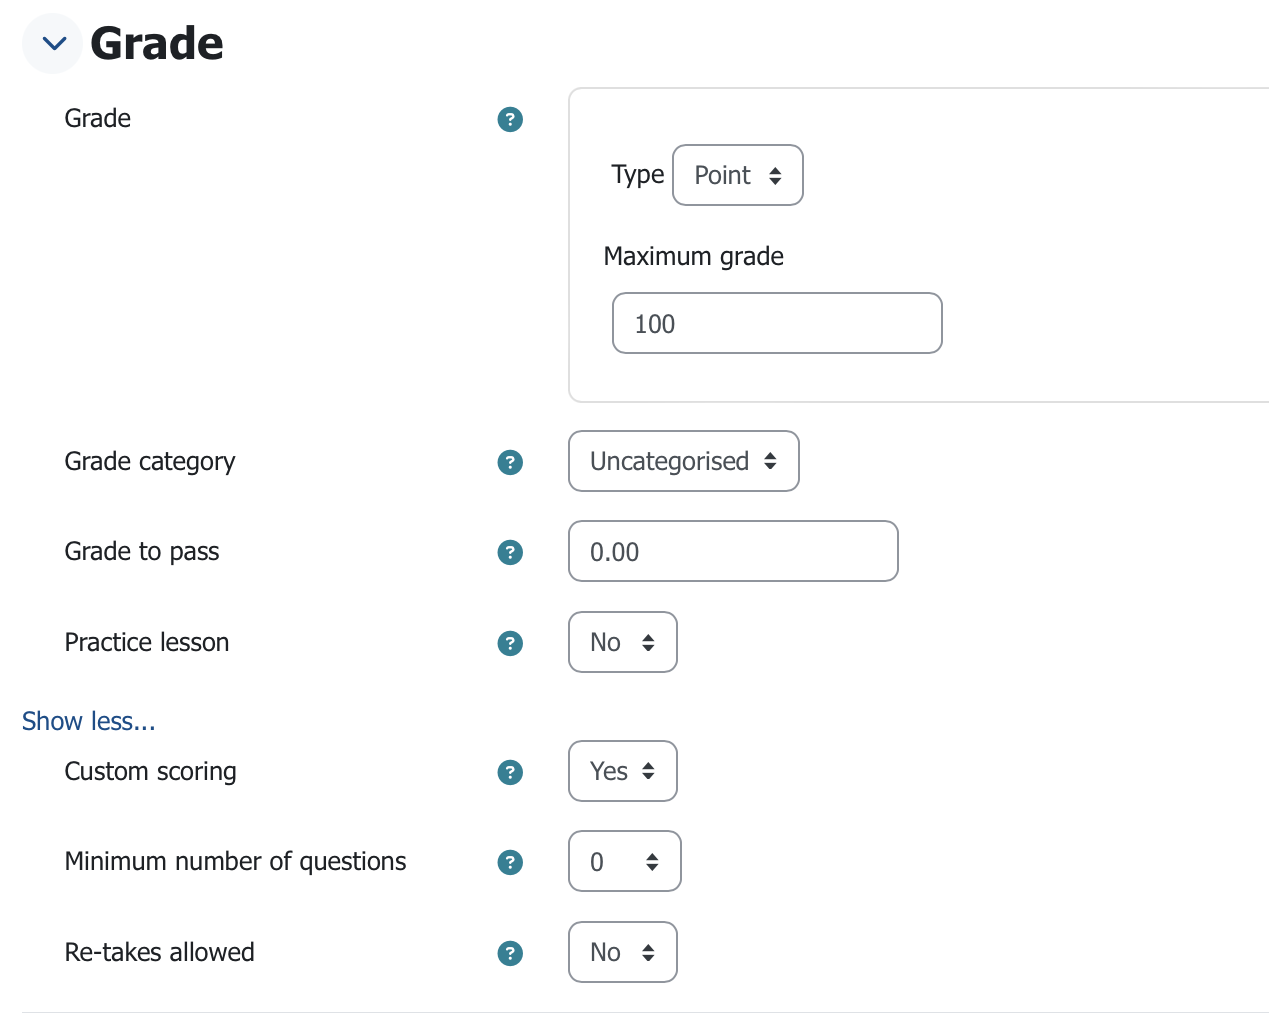
First, you can choose the type of grading; in most cases, grading by points is sufficient. You can enter the maximum number of points that can be achieved for this assignment just below.
For the grading method, you can choose between simple direct grading and two advanced grading methods.
Next, you can select a grading category for this assignment, if one has been created.
Passing grade sets the required minimum grade for passing. This value is used in activity and course completion, and in your grading overview, a pass is marked in green and a fail in red.
It is also possible to anonymize participant identities during grading.
The last two points concern the number of grading passes; if enabled, several steps are taken before participants can see their grades. This allows for multiple grading passes before all grades are simultaneously made visible to the participants.
Grades can be entered in various places. Each location has its respective advantages and disadvantages. For example, if you enter grades for an assignment directly on the assignment's grading page, the advantage is that students receive an automatic notification of their grade. However, this notification does not occur if you enter the grade in the course gradebook or the single view grading page.
Additionally, individual users can be assigned to specific graders.
Grading an Assignment
In the following, we will focus on grading directly on the assignment's grading page. The process is largely the same in your gradebook, with only a few small differences.
To do this, click on the assignment you want to grade. Now you see the following overview as you can see on the Screenshot “Grading Overview”.
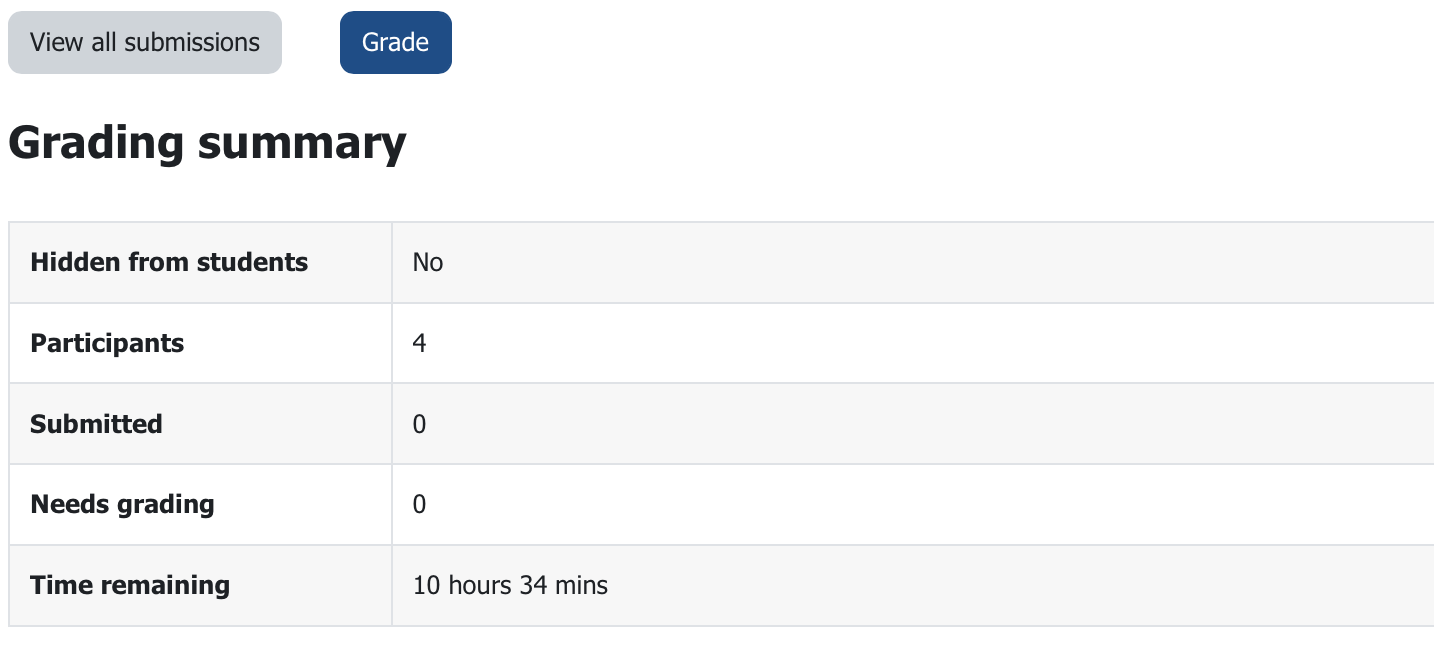
There, you can see the current number of participants in the course, the number of submissions already made, and the number of expected grades.
Additionally, if configured, the remaining time is displayed.
When you click on “View all submissions”, the submission overview for this specific assignment will open.
At the bottom, you have the following options:
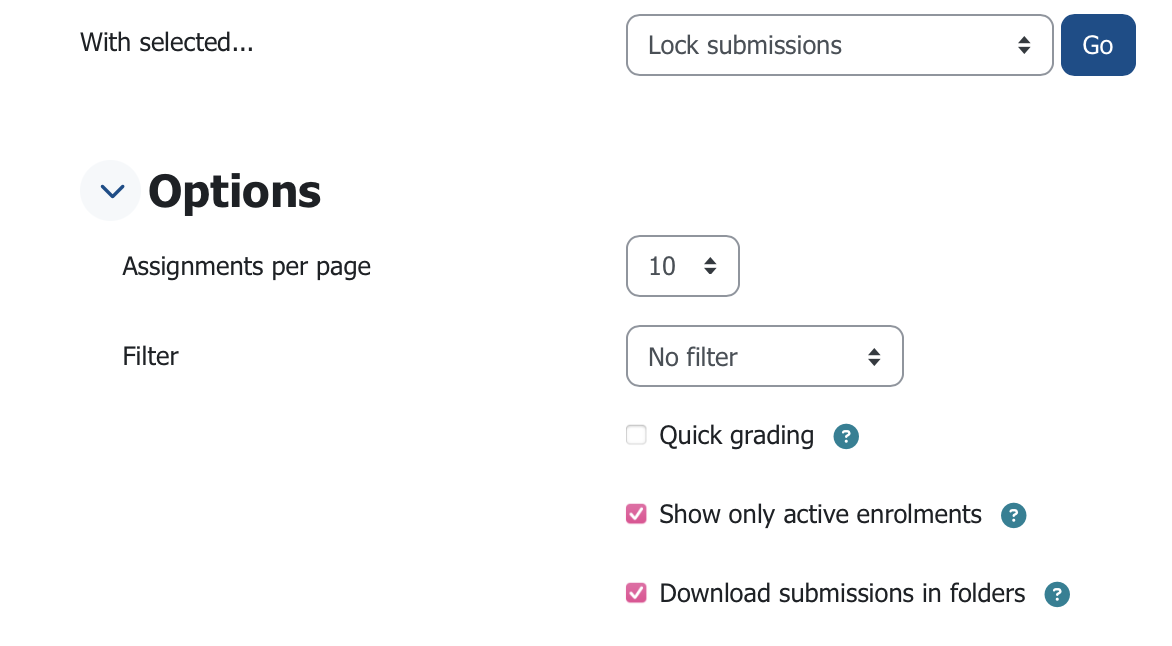
Using the dropdown menu “With selected…”, you can lock/unlock selected submissions, extend the submission period individually, or send a feedback file.
Under the options, you can set how many assignments are displayed per page and filter them, for example, by expected grades.
This is helpful if you expect many submissions, to keep an overview.
If you have now filtered your table, only the expected grades will be displayed.
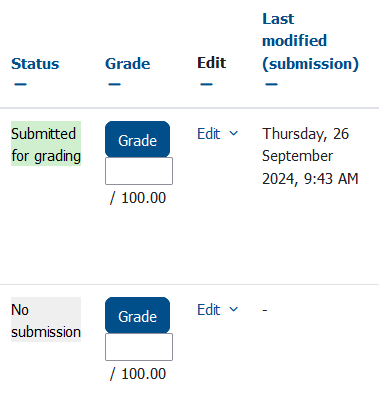
You will now see the students to be graded (name, email address), the current status of the assignment, the “Grade” button, an “Edit” dropdown menu to lock the submission or extend the submission period, the date of the last modification, the submitted file, submission comments, the date of the last grade modification, feedback as a comment, if a PDF was submitted, a file with annotations in it, the uploaded feedback files, and their final grade.
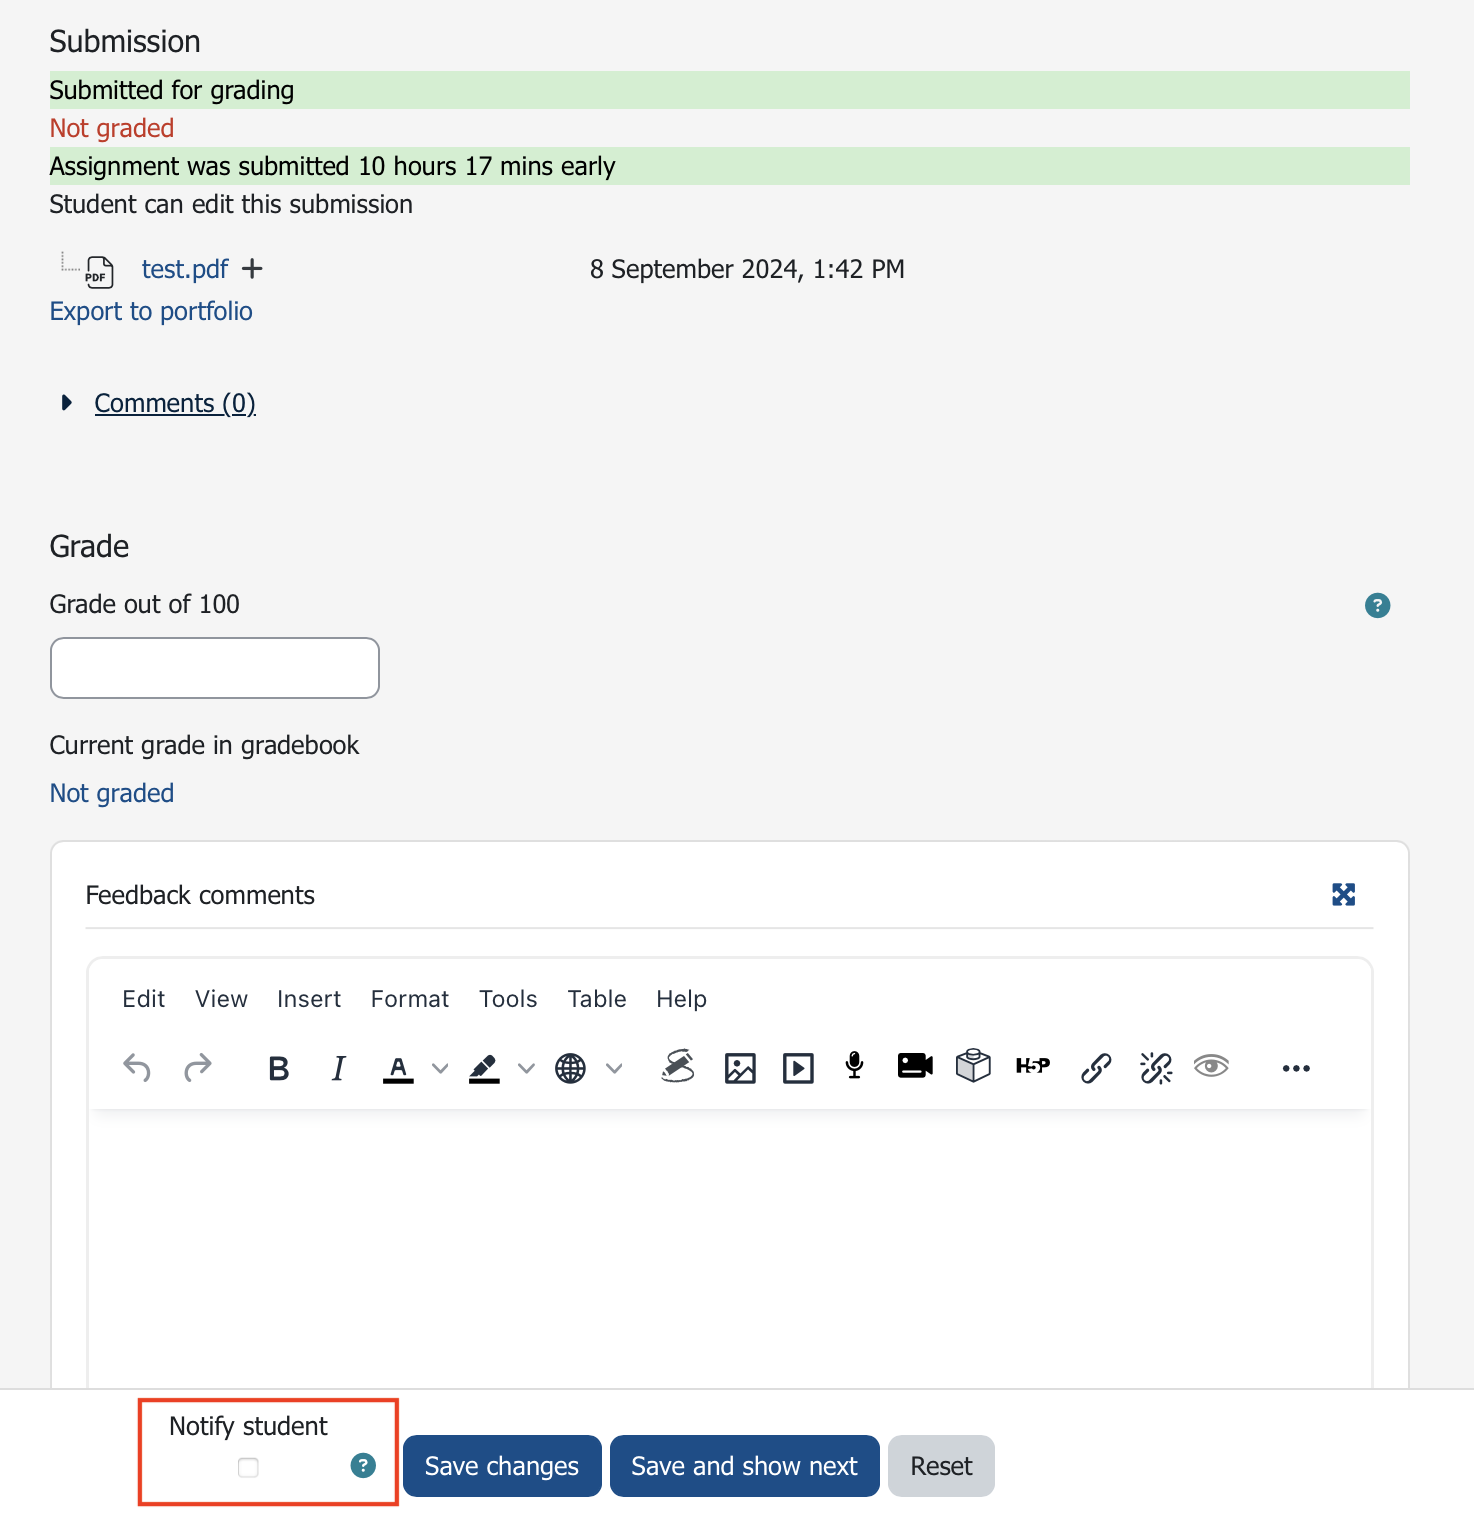
Clicking the “Grade” button will take you to the single grading view where you can proceed with grading.
This opens the single grading window, where you can assign grades, feedback, comments, etc. At the bottom, you can also decide whether students should receive an email notification once their submission has been graded by selecting “Yes” for “Notify students”.
Quick Grading
The “Quick Grading” feature can be activated within the “Options” section at “View all submissions”. See screenshot above: Options at “View all submissions”.
The Quick Grading allows you to enter grades directly in the overview table. This option is not available for advanced grading methods (such as rubrics).
If you have filtered your table, only the expected grades will be displayed.
You will now see the students to be graded (name, first name, email address), the current status of the assignment, and, if enabled, the option to enter the grade directly in the window (Quick Grading). There is also an “Edit” dropdown menu to lock the submission or extend the submission period, the date of the last modification, the submitted file, the option to leave a submission comment, the date of the last grade modification, a window to provide feedback as a comment, a file with annotations if a PDF was submitted, the uploaded feedback files, and the final grade.
Under “Grade”, you can now directly enter the points achieved in this example and confirm by pressing “Enter”, or alternatively, click on the small pencil icon above the grading field.
This will open the Single Grading window, where you can also assign the grade, feedback, comments, etc.